How to Use a Wood Router
A wood router is an important tool for any woodworker. Having a high-quality wood router along with an ideal set of bits is important for creating impressive designs, making joints, shaping edges of wood along hollowing out grooves.
All these and other tasks can be accomplished with perfection, only you need to understand which router to choose from the variety that is available.
Different types of wood routers are available in the market and you must select one that suits your needs best. Not only purchasing the right one is important but you must be aware of the right way of using a router.
Learning to use these machines would be beneficial in varied applications and beginners can also give their woodworking projects a professional look with the use of a wood router.

What is a wood router?
A wood router is a high-speed rotary cutting tool used to shape and decorate wood in woodworking projects. The key components of a wood router include:
- Motor – Provides power to spin the router bit at high RPMs (typically 8,000 – 30,000 RPM). Can be fixed or plunge style.
- Base – Controls the movement of the router over the workpiece. Can be fixed or plunge style.
- Collet – Holds and secures the shank of the router bit.
- Router bits – Interchangeable cutting tools that shape the wood. Come in many profiles.
- Depth adjustment – Controls cutting depth by adjusting how far the bit extends from the base.
- Edge guides – Attachments for guiding the router in straight lines.
Routers shape wood by spinning small cutting bits at high speeds to remove material. They excel at cutting grooves, edges, joints, decorations, and other profiles. With an assortment of router bits, the versatility of a router is almost endless. Routers can be used handheld or mounted in a router table. Overall, a wood router is one of the most useful power tools for any woodworking shop.
Types of wood routers
Fixed Base router: A fixed-base router and a plunge router. The fixed-base router is more suitable for edge routing and making straight cuts
Plunge-based: A plunge router allows you to adjust the cutting depth while the router is running, making it more versatile for various tasks. It is the best for beginners
Combo router: A combo router combines the fracture of the fixed base router and plunge base router. And the router interchange between them
Compact router: It is the miniature version of the fixed base router This router has less power but due to its small size it is very easy to use
Cordless router: It is very easy to use and best for light works such trimming and shaping the edges
Understanding Router Components:
Before you start using a wood router, it’s essential to understand its various components and their functions. Familiarizing yourself with these components will help you operate the router safely and effectively
- Motor – Provides the power to spin the router bit at high RPMs. Can be fixed or plunge style. More powerful motors allow for bigger bits.
- Base – Controls the movement of the router over the workpiece. Can be fixed or plunge style. Plunge bases allow the bit to be raised/lowered while running.
- Collet – The tapered shaft that holds and secures the shank of the router bit. Collet nut tightens the collet around the bit.
- Bits – The interchangeable cutting tools that shape the wood. Come in endless profiles for different tasks.
- Depth adjustment – Controls how far the bit extends from the base, setting cutting depth. Uses a turret on fixed bases, a plunge mechanism on plunges.
- Edge guides – Attachments that guide the router in straight lines along a workpiece edge or template.
- Sub-base – A flat baseplate where guides/bits are mounted. Can accept template guides for following patterns.
- Fence – A straight guide for routing edges. Essential router table accessory.
- On/Off switch – Controls power to the motor. Can be trigger, dial, or paddle style.
- Safety features – Locks, switches, and springs to prevent accidental start-up and enhance control.
Knowing the components helps us understand how to best use routers in different situations. Proper router setup and handling contribute to safety and quality results.
Choosing the Right Router
Choosing the right router for your needs is important to get the best results in your woodworking. Here are some tips on selecting a router:
Understanding Router Features
- Base Type – Fixed vs. plunge. Plunge routers offer more versatility.
- Motor Type – Single speed vs. variable speed control. Variable allows fine RPM adjustment.
- Horsepower – Dictates router’s power. Larger bits need more HP (2-3+ HP).
- Collet Size – 1/4″ vs 1/2″. 1/2″ collet accepts larger bit shanks.
- Depth Adjustment – Precise adjustment is needed for accurate cuts.
- Comfort Features – Soft start, vibrations controls, comfortable grip.
Determining Power and Size
- Smaller routers (1-1.5 HP) are good for lighter-duty work. Larger routers (2-3+ HP) are needed for tougher tasks.
- Larger router motors and bits require precision and experience to control safely. Start small if new to routing.
- Match the router power to the typical bit sizes you plan to use.
Considering Accessories
- Edge guides, circle cutters, and sign guides expand a router’s capabilities.
- The router table mounts the router upside down for precision.
- Dust collection helps control wood chips and sawdust.
Reviews of Popular Brands
Top brands like Bosch, DeWalt, Makita, and Porter-Cable make quality routers in various sizes and types. Read reviews and comparisons to choose the best one for your budget and needs.
Router bits (router tools)
There are many types of router bits Every bit have different functions as some are used to make grooves and some are used to make cuts and fine edges
Types of bits
1 Straight Bits:
These are simple, straight-cutting bits that make clean and straight grooves or dados in the wood. They come in various sizes to create different-width cuts.
2. Rabbeting Bit
Rabbeting bits are used to cut a step-like recess at the edge of the wood. They are often used for joining pieces together or making a shoulder for another joint.
3. Flush Trim Bits:
Flush trim bits have a bearing at the top that rides along the edge of a template or previously cut piece. They are ideal for trimming the excess material to match the shape of the template.
4. Roundover Bits:
Roundover bits create a smooth, rounded edge on the wood. They are great for giving a finished look to furniture edges and decorative moldings.
5. Cove Bits:
Cove bits cut concave, rounded grooves in the wood. They are often used for decorative purposes and add a nice touch to the edges of furniture.
6. Chamfer Bits:
Chamfer bits make beveled edges or cuts on the wood. They are used to add a decorative touch or to eliminate sharp corners.
7. Dovetail Bits
Dovetail bits are used for making dovetail joints, which are commonly found in drawers and other furniture. They create strong and interlocking joints.
8. Roman Ogee Bits:
Roman ogee bits create a classic “S” shaped profile on the wood. They are often used for decorative molding
9 Simple Steps to follow for proper use of a wood router
Wood router is termed to be a versatile tool that offers you complete flexibility in terms of bit configuration. With different applications, you can use this tool however learning how to use it is important for taking out most benefits of a wood router. Follow these steps and you can get your woodworking jobs done with ease.
Step 1: Clamp the board to the router table.
Have the poplar board clamped to the working table edge in order to get the board extending out through the table edge. You should have the board edge on your right as the router would spin clockwise. Wood is cut with the use of a router with the aid of bit rotation.
Step 2: Fit the wrenches.
Remove the router from the router kit along with two wrenches. Now fit the small wrench with the router shaft and the bigger one must be fitted at the router end. Wrenches must be fitted at their proper places. In order to lose the nut, you would need to hold the small wrench and then turn the bigger one counterclockwise.
Step 3: Place the bit.
The router collet is a hole in the nut end that you have loosened now. The bit must be placed in the router collet by sliding until it comes out at the bottom. Now have the small wrench steady and you can then tighten the bigger nut.
Step 4: Set the router on board.
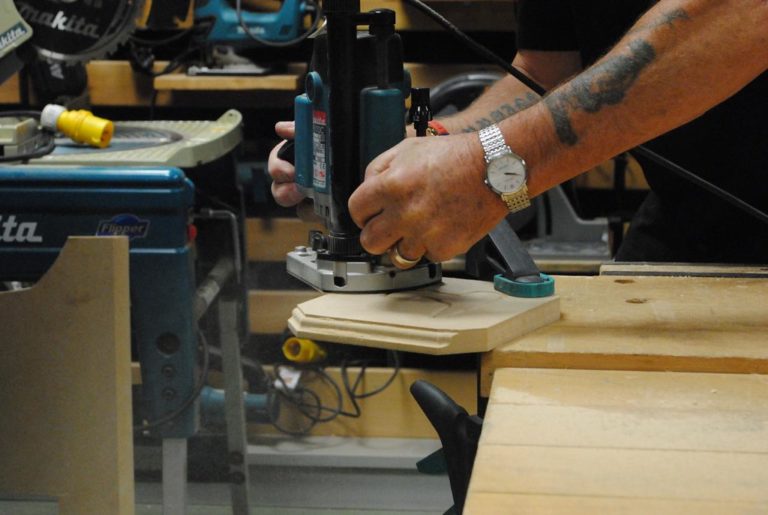
You must hold the router with both hands with the use of handles placed on both sides of your wood router. Have the router set on the board and you can now slide the bit up along the wood. Underneath the base of the router, you will see a point where wood and bit will contact.
Step 5: Set the depth of bit.
You will find a knob on the router side that is placed for controlling the depth of the bit. A depth gauge is also located at the right-hand side. You must turn the knob clockwise for raising bit while lowering can be done counterclockwise. You can set the bit at the center of the board edge and then tighten the knob.
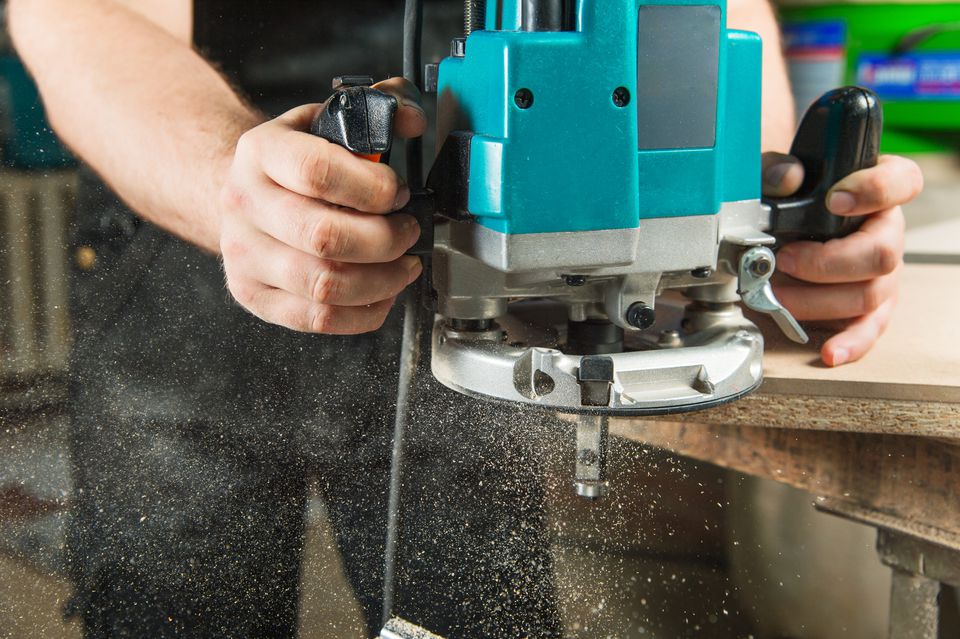
Step 6: Hold the router firmly for use.
While setting router for use, you must hold it firmly on both sides. Now move bit but router base must remain at rest on the board. An easy-to-reach switch is located that must be turned on for operation. Router recoil would twist as the motor would begin so be aware of that.
Step 7: Check thickness of your work piece.
The piece of wood that you fasten must have same thickness as your bench work piece. This would give complete operational support to your router and would keep it from wobbling.
Step 8: Feed the router.
Always feed router from left side to right so that cutting edge bit would meet the wood first. A range of shallow passes would work better rather than a deep pass that could result in binding of wood or twisting of tool. Gradual extending of bit for shallow passes would give you best results. Router must never be pushed as it could result in slowing down of engine and blade. This way you can burn wood or get splinters. Bit must be eased in the wood until the bit bearing comes in contact with the wood. Pull the router towards you and slowly step back. Slowly pull router along the wood edge and let it slide along the wood side. As you reach the board end, router should slide off.
Step 9: Turn router off after job done.
Now turn the switch of the router off and it would slow down spinning until it completely turns off.
Basic Wood Routing Techniques
- Routing Edges and Chamfers – Use a piloted chamfer, roundover or ogee bit to soften edges or create decorative edges. Use a straight bit and edge guide for straight edges.
- Dadoes and Rabbets – Cut dadoes (grooves across the grain) and rabbets (L-shaped grooves) for shelving with a straight bit. Use a router table or edge guide.
- Dovetail and Box Joints – Use a dovetail bit with a straight or comb template to cut these interlocking joints.
- Decorative Cuts – An endless variety of engraving, carving, and edge bits can add decorative details.
- Template Guides – Bushing guides follow a pattern for repetitive cuts. Used with jigs and templates.
Advanced Wood Routing Techniques
- Complex Shapes – Make custom decorative edges by using a bearing-guided pattern bit against a template.
- Flutes and Spirals – Use special bits to create fluted columns or spiral shapes. Requires steady, experienced hands.
- Inlays and Inlets – Rout pockets to insert custom decorative wood or resin inlays into the workpiece.
- Router Table Techniques – With the router inverted in a table, both hands can control the workpiece for optimal control.
- Joinery Techniques – Dovetails, edge joints, mortise and tenon joints utilize specialized router bits.
Mastering Advanced Router Techniques
Covo cutting
Cove cutting involves using a cove bit to create concave, rounded grooves along the edge or surface of the wood. To get a smooth and consistent cove cuts, maintain a steady feed rate and make sure the router is stable throughout the cut. You can create various decorative profiles by adjusting the bit’s depth and the distance from the edge of the wood.
Dado Joint
Dado joints are commonly used for shelves and dividers in woodworking projects. To create a dado joint using a router, use a straight bit and guide the router along a straightedge to cut a groove across the wood grain. Make multiple passes to get the desired width of the dado, and ensure the edges are clean and flat for a precise fit with the mating piece.
Mortise and Tenon Joint
Mortise and tenon joints are sturdy and commonly used in furniture making. The mortise is a rectangular hole, and the tenon is a corresponding tongue on the mating piece. Use a plunge router with a straight bit to cut the mortise, and a table saw or a router with a straight bit and a guide to create the tenon. Careful measurement and alignment are crucial to ensure a tight and accurate fit.
With practice, you can leverage both basic and advanced routing techniques for limitless creativity in your woodworking projects.
Tips to follow for Safe Use:
- Always read instruction manual before beginning to use your wood router for the first time in order to have yourself familiarized with the tool. Follow all precautionary steps for safe use.
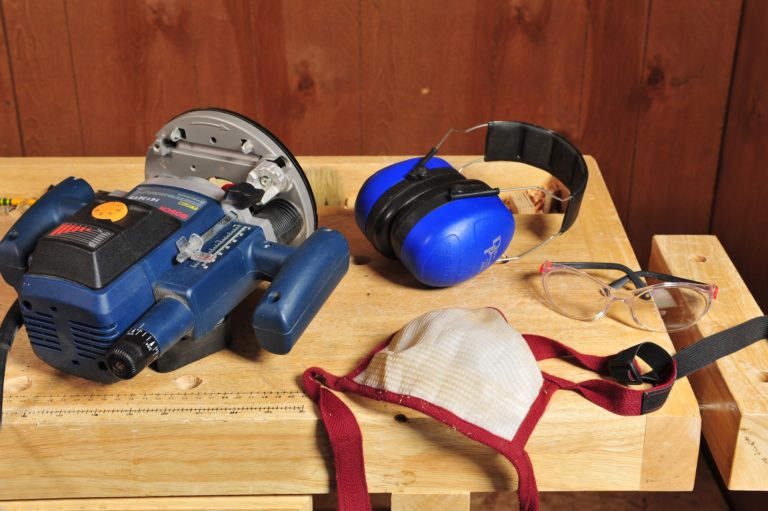
- Wearing safety glasses is compulsory when operating a wood router or any similar machine. This is important for safe use as using without safety glasses can have adverse effects on your eyes.
- When you are setting up the tool or are carrying out a tool change, you must always unplug the router first.
- Tool change must be performed with leather gloves worn over your hands. These machines have sharp edged tools and these sharp tools can create deep cuts in your hands, so one must remain really careful while handling these tools.
- You must also wear a dust mask when using router.
- Routers usually make a lot of noise so you can use ear plugs to protect ears.
- Avoid using router over wet wood.
- Check wood for any warps, nails and knots.
- As you turn the router on, check to see that bit must not touch the wood.
- Bit used must always be sharp. Dull ones would only complicate your work. Learn how to maintain your wood router well in order to avoid any waste of material.
- Cutting with free hands need practice, time and patience along with steady hands. You can use an edge guide for proper use.
Beginners: Always begin with a test wood piece in order to have an idea of how much depth of cut is desired. Scrap wood used for testing would enable you to get used to of handling power of this machine. Turn the machine on and it should begin spinning before you have the wood I contact with the bit. If the setting is okay and you are satisfied with the results, you will be good to use your work piece.
Conclusion
Router is an important tool but it could be really dangerous if have no knowledge on safe use of this machine. A little information on using a router would ensure safe operation and you would get your desired wood working applications performed really quick and accurate. Router is a versatile tool and you will be pleased with the results but you need to be extra cautious especially if you are a beginner. Consider checking wood router reviews in order to find a perfect tool for your special wood working projects.