How to Change Your Miter Saw Blade: A Comprehensive Guide
Hey there, fellow DIY enthusiasts! I’m DIY Dave, and I’ve spent years mastering the art of woodworking and home improvement. If you’re reading this, chances are you’ve got a miter saw sitting in your workshop. It’s a fantastic tool, isn’t it? But like any tool, it requires a bit of upkeep. One task that comes up now and then is changing the blade on your miter saw.
Don’t worry if you’ve never done it before; it’s a straightforward process, and I’m here to guide you through it, step-by-step. We’ll cover everything from identifying when it’s time to switch out your blade to the actual process of doing so, all while keeping safety front and center.
When is it Time to Change the Blade?
Before we dive into the nitty-gritty, let’s figure out when it’s actually time to consider changing your miter saw blade. You don’t want to fix something that isn’t broken, right? Here are some telltale signs that your blade might need a swap:
- Excess Burn Marks: If you’re noticing more burn marks than usual on your cuts, that’s a red flag.
- Chipping: A blade that needs changing will often cause your material to chip.
- Visual Inspection: Take a look at the blade. Do you see any warped, bent, or missing teeth? Those are clear signs that it’s time for a change.
Alright, now that we know when it’s time to replace the blade, you’re going to need a couple of tools. Most of these should already be in your DIY toolbox. We’ll get into that in the next section, but before we move on, a word on safety: Always prioritize your safety when working with power tools. Disconnect the power source before you begin any adjustments.
Choosing the Right Miter Saw Blade for Different Materials
While knowing how to change a blade is crucial, selecting the right blade for your specific project is equally important. Different materials require different types of blades to achieve the best results. Let’s go over some common blade types and what they’re best suited for.

Wood Cutting Blades
- Crosscut Blades: Ideal for making smooth cuts across the grain of the wood. They usually have more teeth for a finer finish.
- Rip Blades: These blades are designed to cut along the grain of the wood and typically have fewer teeth.
- Combination Blades: As the name suggests, these blades are versatile and can be used for both crosscutting and ripping.
Expert Tip: Look for carbide-tipped blades for longer-lasting sharpness.
Metal Cutting Blades
- Ferrous-Metal Blades: These blades are specially designed to cut through metals like steel and iron. They are usually coated to resist heat and wear.
- Non-Ferrous Metal Blades: These are for softer metals like aluminum and copper. They usually have more teeth for a smoother cut.
Safety Note: Always wear eye protection when cutting metal due to the risk of sparks.
Plastic and PVC
- Triple-Chip Grind (TCG) Blades: These blades provide a smooth finish and are ideal for cutting through plastics and PVC materials.
Specialty Blades
- Dado Blades: Used for making grooves and dado cuts in wood.
- Diamond Blades: Used for cutting through tile and masonry.
Pro Tip: Always check the blade’s RPM (Revolutions Per Minute) rating and ensure it’s compatible with your miter saw.
General-Purpose Blades
- 24-tooth and 40-tooth Blades: These are all-purpose blades that can handle a variety of materials but may not offer the smoothest finish.
Tools You’ll Need and Initial Preparations
Before we get our hands dirty, let’s make sure we’ve got all the tools we’ll need for this project. Trust me, there’s nothing more frustrating than starting a task and realizing you’re missing something crucial. So, here’s a quick checklist for you:
Tools Checklist:
- Work Gloves: Safety first! Always protect your hands.
- Screwdriver: For removing the blade guard.
- Allen Wrench: You’ll need this to loosen the blade bolt.
- User Manual: Different miter saws have different quirks, so it’s good to have the manual on hand.
Got everything? Awesome, you’re all set to go!
Preparing Your Miter Saw
Before we get to the actual steps of changing the blade, we need to prepare the saw. Follow these preliminary steps:
- Disconnect the Power Source: I can’t stress this enough—safety is paramount. Unplug the miter saw from the socket or remove the battery if it’s a cordless model.
- Put on Your Work Gloves: Always better to be safe than sorry. Plus, the gloves will give you a better grip.
- Consult Your User Manual: Take a quick peek at your user manual to see if there are any specific instructions for your miter saw model. While most saws follow a similar process for blade changing, it’s always good to double-check.
- Clear the Area: Make sure you’ve got a clean, flat surface to work on. Clear away any obstacles or debris around your miter saw. A clutter-free workspace is a safe workspace!
There you go, your miter saw is now ready for a blade change! In the next section, we’ll dive into the actual steps for removing the old blade. But before we do, here’s a quick safety tip: Always double-check that the power source is disconnected before you touch any part of the blade. You can never be too careful!
Changing the Blade: Step-by-Step Guide
Now that you’re all set up and have double-checked your safety precautions, let’s get into the real action. Changing the blade on a miter saw involves a few key steps. Don’t worry, I’ll walk you through each one.
Step 1: Remove the Blade Guard
- Locate the Screw: The blade guard is usually attached with a screw. Locate this screw on your miter saw.
- Unscrew the Guard: Use your screwdriver to carefully unscrew the blade guard. Keep the screw in a safe place; you’ll need it later.
- Remove the Guard: Once the screw is removed, gently lift the blade guard away from the blade.
Quick Safety Tip: Always ensure the power source is disconnected before you start working on the blade guard.
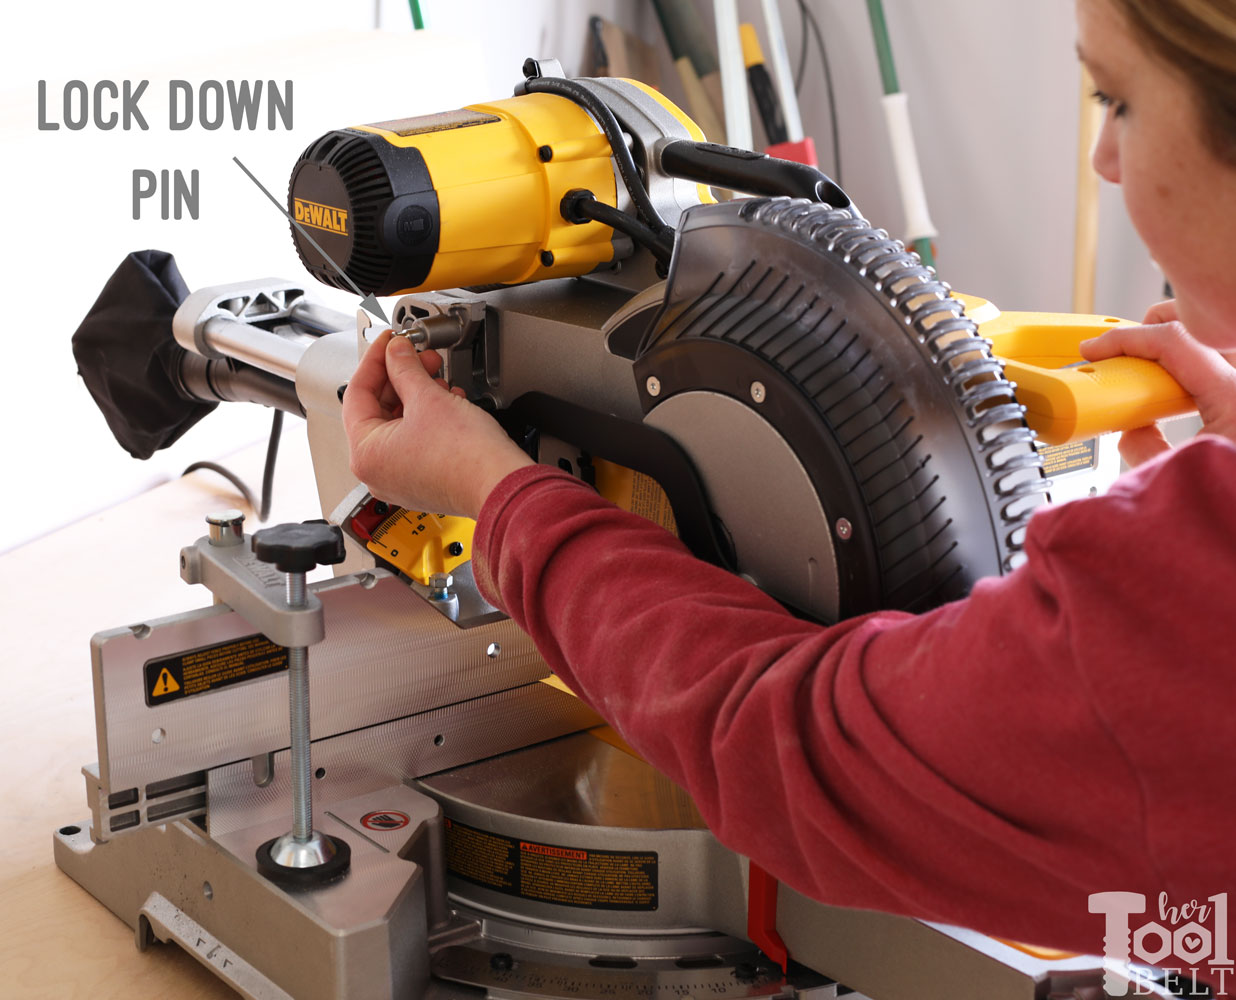
Step 2: Lock the Blade
- Find the Spindle Lock: Your miter saw should have a spindle lock, generally located at the back or front of the saw housing.
- Press and Lock: Press down on the spindle lock to secure the blade in place. Make sure it’s firmly locked to prevent any movement.
Step 3: Loosen and Remove the Blade
- Grab Your Allen Wrench: You’ll need this tool to loosen the bolt holding the blade.
- Turn Clockwise: Insert the Allen wrench and turn the blade clockwise to loosen the bolt.
- Remove Washers: Carefully remove the outer washer with your fingers. Don’t touch the inner washer.
Expert Tip: Feeling uneasy about handling the blade? Put on another pair of work gloves for added safety.
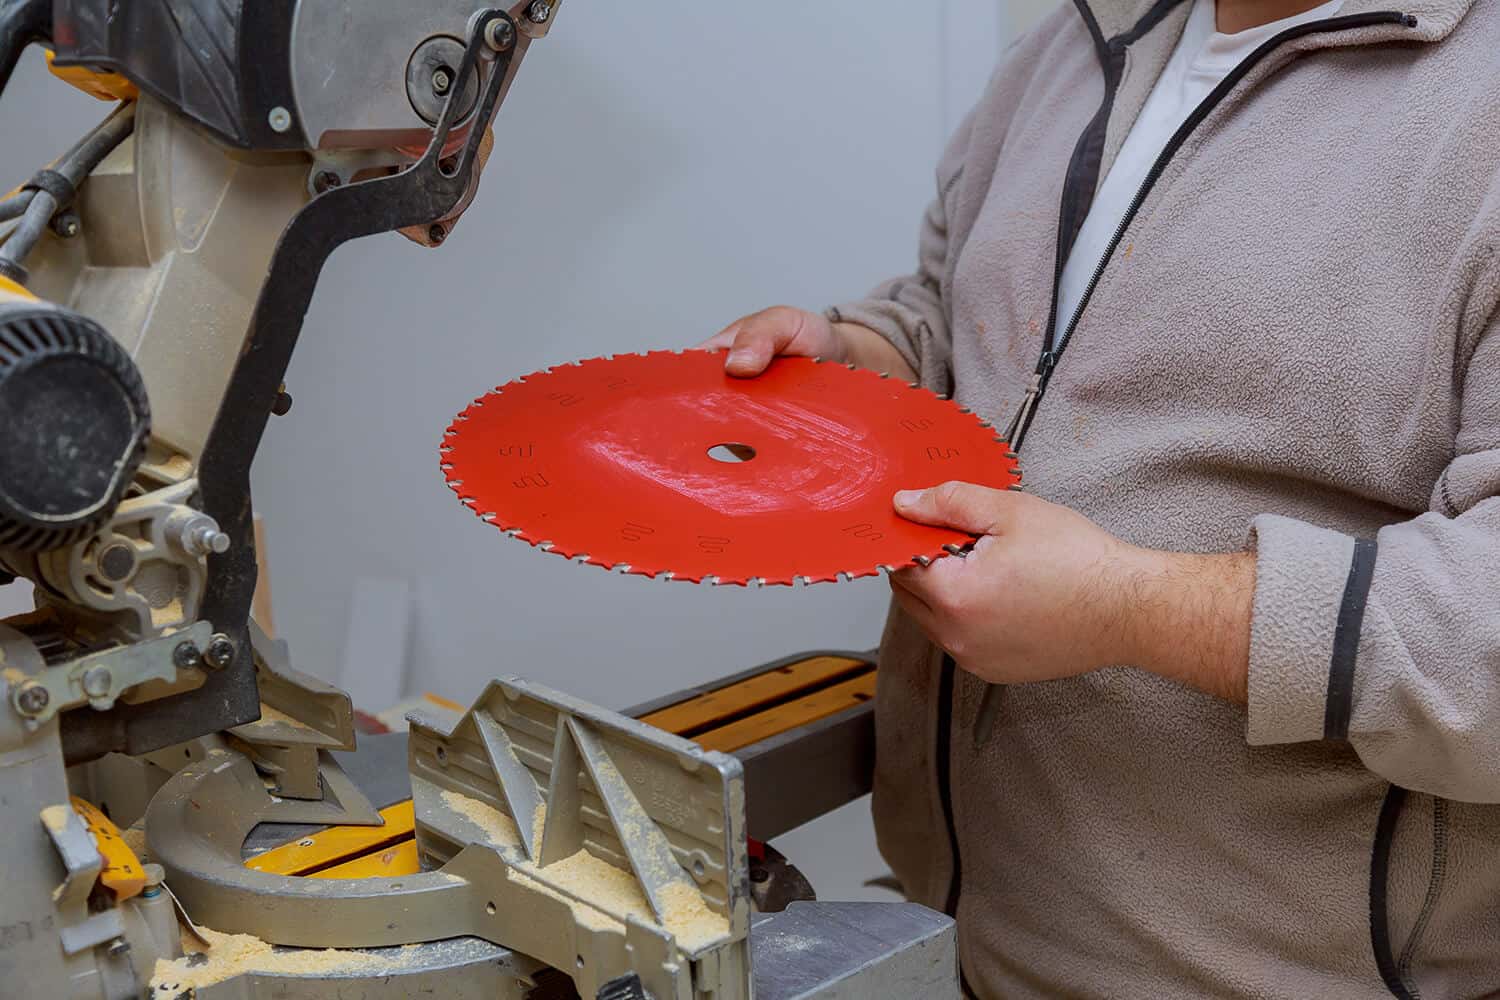
Step 4: Insert the New Blade
- Check the Manual: Always consult your user manual for the manufacturer’s recommended blade type.
- Wipe Off Any Oil: Some blades have oil on the washers for lubrication. Wipe this off before installation.
- Fit the New Blade: Carefully fit the new blade onto the spindle, making sure it sits over the inner washer.
- Tighten the Bolt: Use your Allen wrench to tighten the bolt by turning it anticlockwise.
Safety First: Make sure the blade is well-secured. A loose blade can be very dangerous.
And there you have it! You’ve successfully changed your miter saw blade. All that’s left is to reattach the blade guard, which we’ll cover in the next section. But before that, do you have any questions? Feel free to drop them in the comments below!
Step 5: Reattach the Blade Guard
- Locate the Screw: Remember that screw you kept safe when you removed the blade guard? Time to bring it back into play.
- Place the Guard: Align the blade guard back into its original position.
- Secure with Screw: Use your screwdriver to secure the blade guard back in place.
Final Safety Check
- Double-Check the Blade: Make sure it’s tightly secured. Give it a gentle tug to confirm it’s locked in place.
- Reconnect Power: It’s safe to reconnect the power source now, but keep the saw off.
- Test Run: Turn on the miter saw and let it run for a few seconds. Listen for any unusual sounds and observe for any wobbling. Turn it off.
- Inspect Once More: Disconnect the power source again and perform a quick visual inspection to make sure everything looks good.
Safety Reminder: Always disconnect the power source when doing any final checks.
You’re All Set!
Congratulations, you’ve successfully changed the blade on a miter ! You’re now ready to get back to all those amazing DIY projects you’ve been planning.
Troubleshooting Tips: Solving Common Blade Replacement Issues
Even with the best of guides, sometimes things don’t go as smoothly as we’d like. So, let’s talk about some common issues you might encounter while changing your miter saw blade and how to troubleshoot them.
Blade Stuck or Won’t Come Off
- Check the Spindle Lock: Sometimes, the blade won’t come off because the spindle lock isn’t fully engaged. Make sure it’s pressed down securely.
- Apply Some WD-40: If the blade is still stuck, it may be due to rust or grime. Apply a little WD-40 around the bolt and wait a few minutes before trying again.
- Gentle Taps: Use a rubber mallet to gently tap the blade. This can help dislodge any particles that may be causing the blade to stick.
Expert Tip: Always ensure the saw is disconnected from the power source before attempting any of these steps.
Bolt Won’t Loosen
- Right Tools: Make sure you’re using the correct size Allen wrench. Using the wrong size can strip the bolt.
- Counter-Torque: Sometimes, applying a counter-torque can help. While holding the Allen wrench in one hand, use your other hand to apply a gentle counter-pressure against the blade.
- Heat It Up: As a last resort, applying a small amount of heat with a heat gun can help expand the metal, making it easier to turn the bolt. But be cautious not to overheat, as this can damage the saw.
Safety Tip: If you resort to using heat, make sure to wear heat-resistant gloves and work in a well-ventilated area.
Blade Wobbles After Installation
- Check Alignment: Make sure the blade is correctly aligned with the washers and bolt.
- Tighten the Bolt: A loose bolt can cause the blade to wobble. Use your Allen wrench to tighten it securely.
- Consult Manual: Some saws have specific alignment instructions. Always check your user manual for any model-specific guidance.
Reminder: Always perform a test run and a safety check after solving any of these issues to make sure everything is working correctly.
Maintenance and Care: Ensuring Longevity and Optimal Performance
Changing your miter saw blade is just one part of the equation. To ensure you get the best performance and longevity out of your blades, regular maintenance is crucial. Let’s delve into some key aspects of blade maintenance.
The Importance of Regular Maintenance
Your miter saw is a workhorse, but like any machine, it requires regular care to function optimally. Regular maintenance helps in:
- Enhanced Performance: A well-maintained blade cuts more efficiently, saving you both time and effort.
- Longevity: Proper care can significantly extend the life of your blade.
- Safety: A well-maintained blade is less prone to chipping or breaking, reducing the risk of accidents.
Cleaning, Sharpening, and Storage
Cleaning
- Remove Residue: Over time, sap and wood residue can build up on the blade, affecting its performance. Use blade and bit cleaner to remove this buildup.
- Brush Gently: Use a soft wire brush to remove any remaining residue.
Sharpening
- Check for Dullness: A dull blade is inefficient and can be dangerous. Check for dullness by making a test cut on scrap wood.
- Use a Diamond File: For minor dullness, a diamond file can be used to sharpen the blade’s teeth. For severe dullness, consider professional sharpening.
Storage
- Blade Protector: Always store the blade in a blade protector or a wooden case to prevent any accidental chips or damages.
- Dry Place: Store the blade in a dry place to prevent rust.
Pro Tip: Always disconnect the power source before performing any cleaning or maintenance tasks.
The Benefits of a Sharp and Properly Installed Blade on Your Miter Saw
You might think that a blade is just a blade, but using a sharp and properly installed blade on your miter saw can make a world of difference. Here’s why:
Improved Efficiency
- Faster Cuts: A sharp blade cuts through materials much more quickly, saving you valuable time on your projects.
- Reduced Effort: With a sharp blade, the saw does most of the work, reducing the physical effort required on your part.
Quality of Cuts
- Smooth Finish: A sharp blade leaves a smoother finish, reducing or even eliminating the need for sanding.
- Accurate Cuts: A properly installed and sharp blade ensures that your cuts are precise and accurate, which is crucial for projects that require exact measurements.
Safety
- Reduced Kickback: A sharp and well-installed blade is less likely to catch on the material, reducing the risk of kickback and potential injuries.
- Less Strain on the Motor: A dull blade makes the motor work harder. A sharp blade reduces strain on your saw’s motor, prolonging its life.
Cost-Effectiveness
- Reduced Waste: More accurate and clean cuts mean less material waste, saving you money in the long run.
- Longevity: Proper installation and regular maintenance of your blade can significantly extend its life, reducing the need for frequent replacements.
User Satisfaction
- Enjoyable Experience: Let’s face it, using a tool that performs well makes the job more enjoyable. A sharp and properly installed blade ensures a smoother operation, making your DIY projects more satisfying.
Expert Tip: Always remember to disconnect the power source before inspecting or changing your miter saw blade. Safety first!
![Top 10 Best Miter Saw for the Money in 2023 [ A Buying Guide ]](https://bestwoodrouterguru.com/wp-content/uploads/2023/07/Best-Miter-Saw-for-the-Money-768x402.webp)
![5 Best Wood Routers for Beginners [Buyer Guide 2023]](https://bestwoodrouterguru.com/wp-content/uploads/2023/05/Top-5-Wood-Routers-for-Beginners-768x402.webp)