How to make a circle with a router
Wood working projects needs you to make different edges, cuts and trimming along with varied decorative shapes using versatile wood working tools. Most of the wood working tasks would need you to cut a range of different circles. For such circles, you can get different circular jigs that are available in market or can even construct one according to your own requirements and dimensions. You can easily make a circular jig as large as the diameter of your router plate and with the use of this simple circular jig you can cut proper circles with the aid of your wood router.
10 Steps for making Circles with your Wood Router
Step 1: Take a piece of plywood and cut it into a circle. In order to determine the size of this circular jig, you would need to take the sub-base plate of your router and cut the circle exactly same as the size of this base.
Step 2: There will be holes in the sub-base of your router and you should duplicate same holes on your circular jig. Drill holes similar to the ones on sub-base in order to get properly aligned sub-base and jig.
Step 3: Now screw base of your router with the circular jig that you have just made. Make sure that the holes of the jig and sub-base are properly aligned.
Step 4: Make pivot holes by drilling in the jig arm. Note that the distance between these pivot holes should be 1 inch.
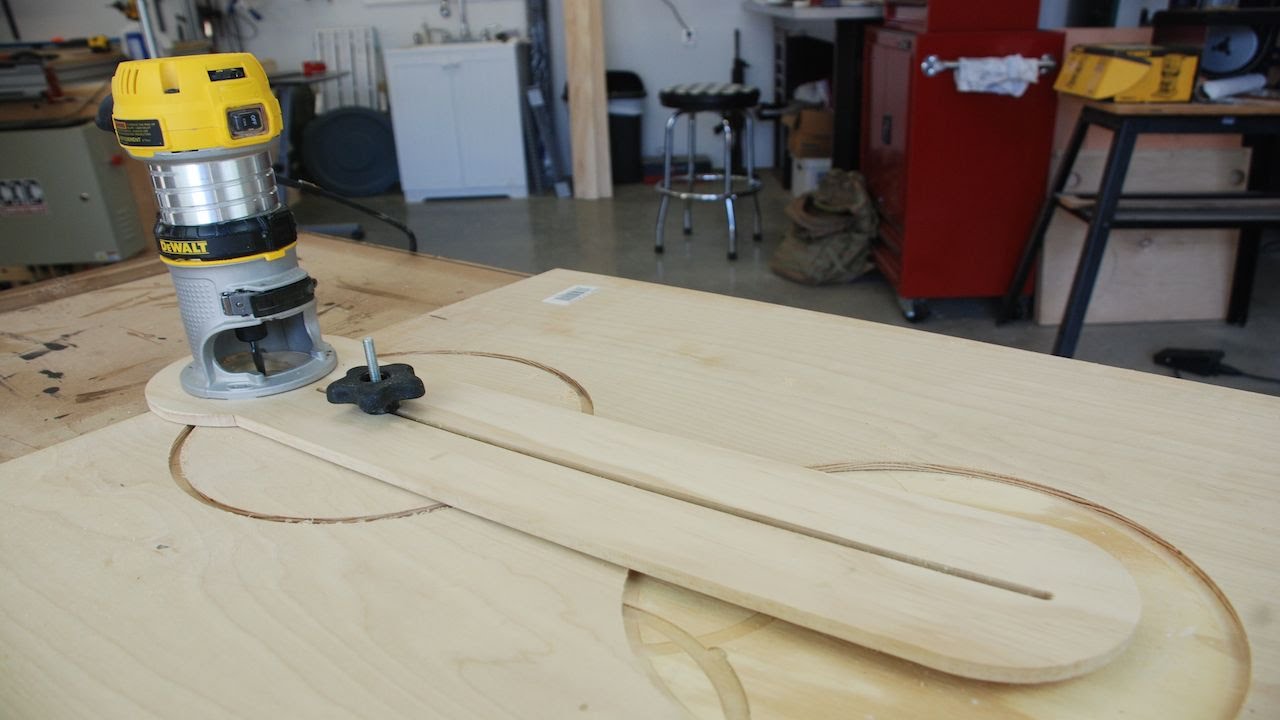
Step 5: For cutting circle with this jig, you need to have a line on the piece of wood from your desired circle center to the radius end (as desired). The router should be centered at the end point radius of the circle to be made. Make a hole in your circular jig corresponding to the working material center and drive a nail on it.
Step 6: Now set appropriate cutting depth with your router bit and use nail as pivot point to make a pass slowly through the work piece. Lower the bit to increase depth and make several other passes to get desired depth of cut.
Step 7: Another jig for cutting circles can be made with some pieces of scrap wood that may be lying around your working space. This jig will be attached to sub-base similar to the one discussed earlier.
Step 8: Then make holes of same size as dowels though one edge of the wood block. Mark the holes at distance exactly similar to the router base diameter. Also sand dowels tips and apple some glue for wood on those holes that you have drilled. Place dowels in these holes and let them dry. Put these dowels in router’s base through holes on the sides.
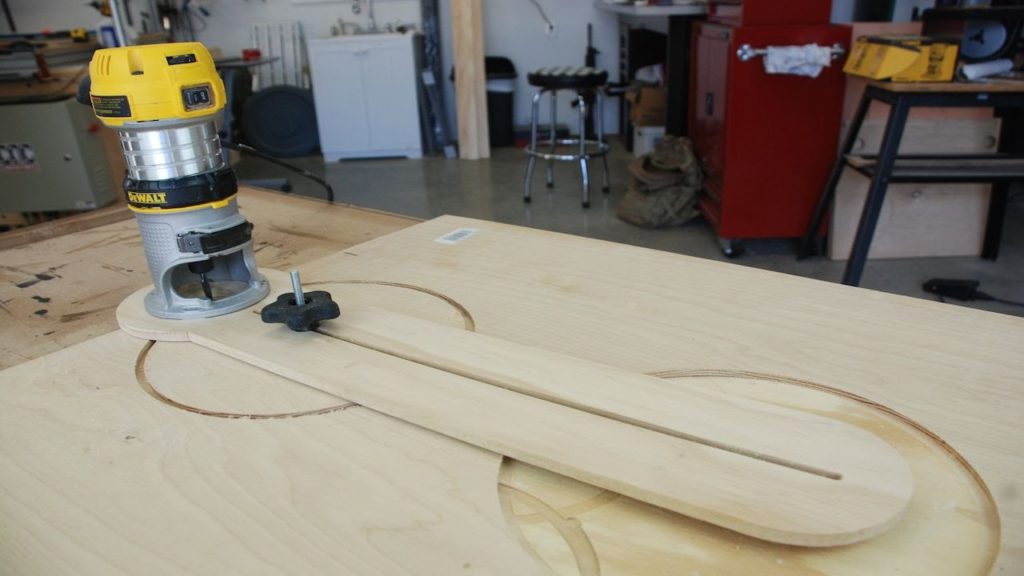
Step 9: Now you are all set to cut a circle or an arch. The center of the circle that you want to cut should be aligned with the nail placed on the center of wood block. Now slide in the router to the spot on dowels and corresponding to the desired radius end point.
Step 10: Adjust depth of your router bit according to depth of cut required and slowly move the router over work piece. Wood block would serve as the pivot point. Do not try to cut circle in one pass, you should go slowly by lowering bit and moving with the cut through several passes of your wood router.
Conclusion
With these steps you will be able to make accurate and stable cuts with complete control over your work piece. You can make other circular cuts and can make rings with inner and outer radius well controlled. Circular cuts are need of any wood working project and this is the simplest way to get it done with using a wood router.